이번 포스팅에서는 Stable Diffusion을 어렵게 설치 없이 간단히 인터넷에서 사용할 수 있는 방법을 공유해 드립니다.
저는 개인적으로 아래의 "3. Hugging Face의 Stable Diffusion WebUI 이용하는 방법"을 추천 드립니다.
1. Stable Diffusion Web 이용하는 방법
아래의 링크를 클릭하여 사이트에 접속합니다.
Stable Diffusion Online
Stable Diffusion Online Stable Diffusion is a latent text-to-image diffusion model capable of generating photo-realistic images given any text input, cultivates autonomous freedom to produce incredible imagery, empowers billions of people to create stunnin
stablediffusionweb.com
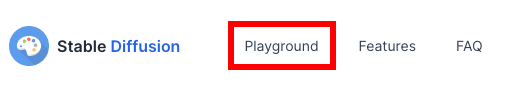
접속화면 상단에 있는 "Playground"를 클릭하거나,
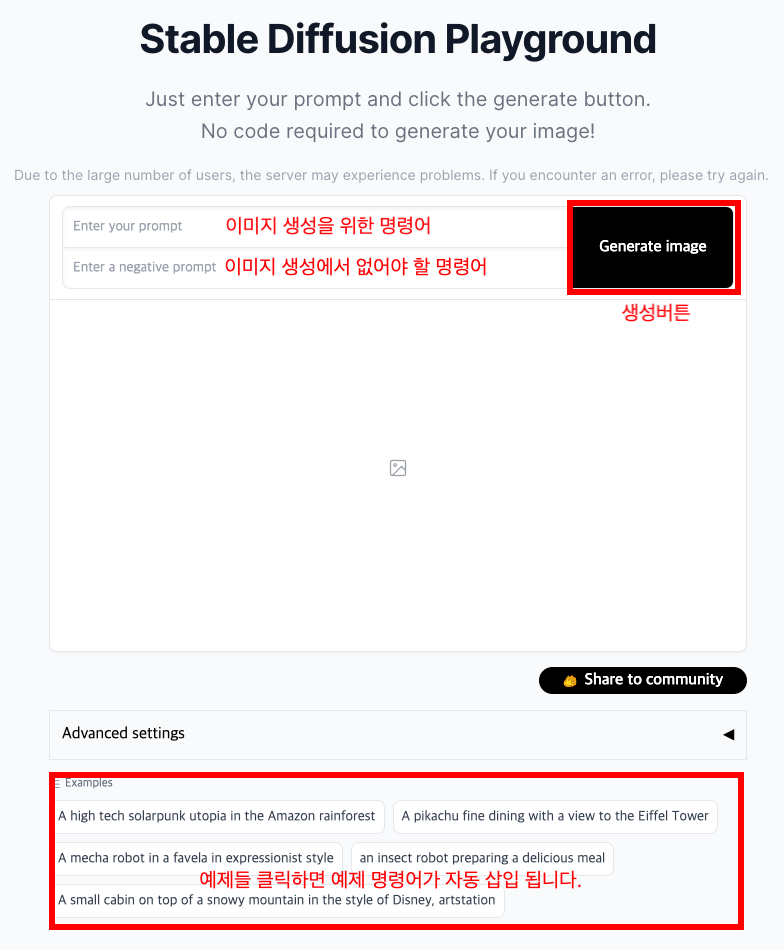
화면을 아래로 스크롤해서 이동하면 아래와 같은 화면을 만나 보실 수 있습니다.
2. Hugging Face의 StabilityAI App 이용하는 방법
Hugging Face에서 App형태로 제공을 하는 경우 각 Spaces에서 접속해서 사용해 볼 수 있습니다.
다음은 Hugging Face에 등록된 Stable Diffusion의 Stable Diffusion v1과 v2.1을 사용하는 방법입니다.
우선, Hugging Face의 Stablility AI에 접속합니다.
stabilityai (Stability AI)
huggingface.co
접속한 화면은 아래와 같습니다.

위 사진처럼 "Stable Diffusion 2-1"과, "Stable Diffusion 1"이 보입니다.
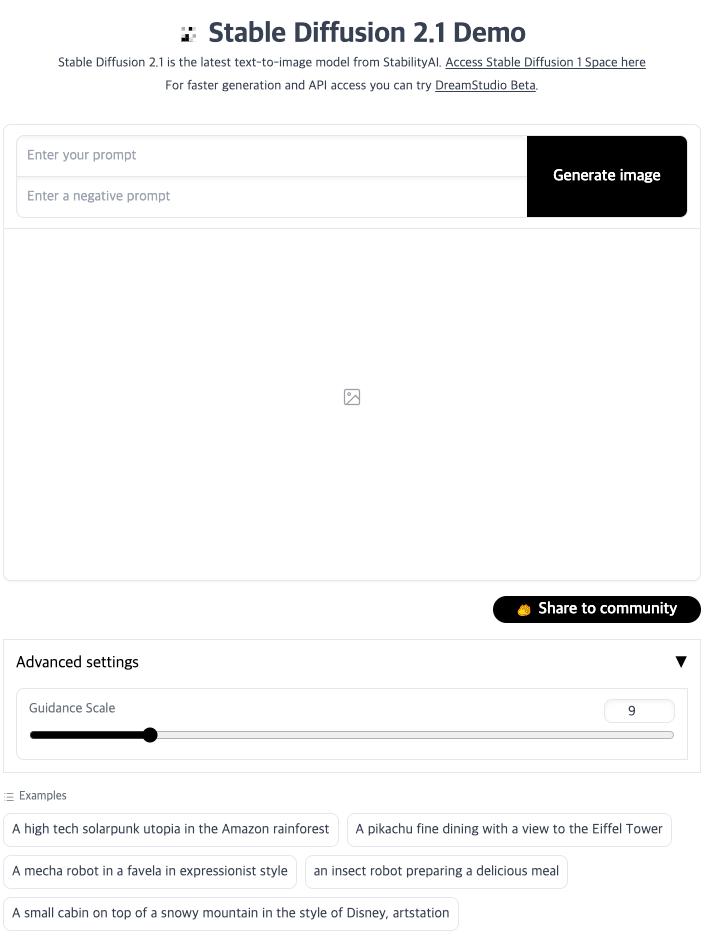
원하는 버전의 App 인터페이스를 클릭합니다. 각 버전의 접속한 인터페이스 화면은 아래와 같습니다.

3. Hugging Face의 Stable Diffusion WebUI 이용하는 방법(추천)
가장 많은 사용자를 가지고 있는 WebUI버전을 사용하는 방법입니다. 위와 마찬가지로 Huggin Face의 Stable Diffusion Web UI Spaces에서 제공하는 App을 이용하는 방법입니다. 아래의 링크를 클릭해서 사용해 보세요.
Stable Diffusion Web UI - a Hugging Face Space by camenduru
huggingface.co
접속 후 보이는 화면은 아래와 같습니다. 말이 필요 없는 인터페이스입니다.
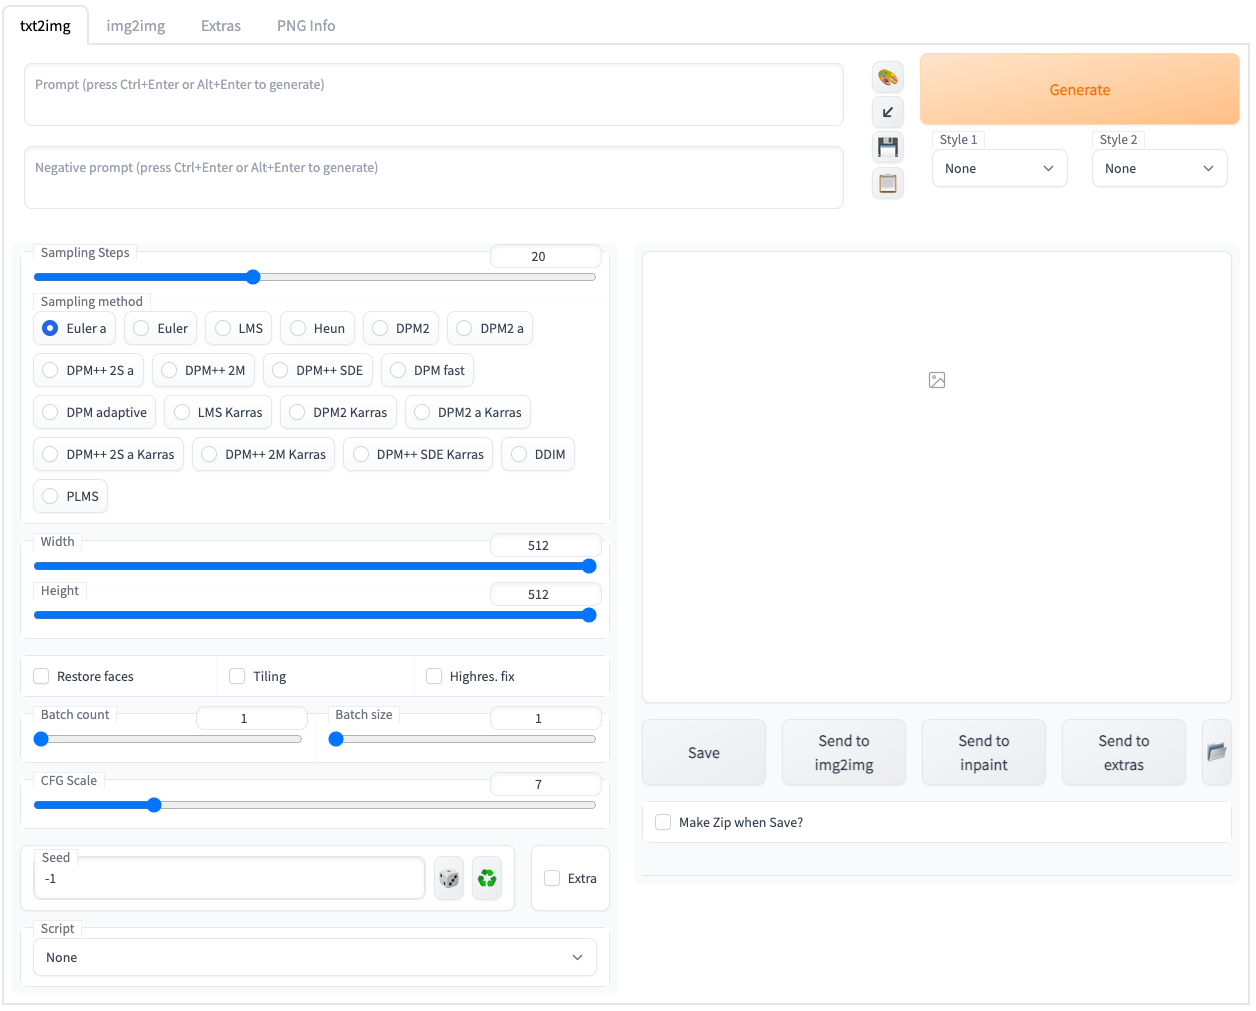
기존 Stable Diffusion WebUI와 정말 동일한 인터페이스를 제공합니다. 정말 많은 다양한 기능을 사용가능하게 합니다. text-to-image image-to-image, inpaint기능등 굵직한 기능을 사용해 볼 수 있습니다. 하지만, 무료 웹 버전이므로 Model 및 Lora와 같은 설정은 할 수가 없습니다.
Hugging Face의 Stable Diffusion WebUI 실제 사용한 예제를 보여 드립니다.
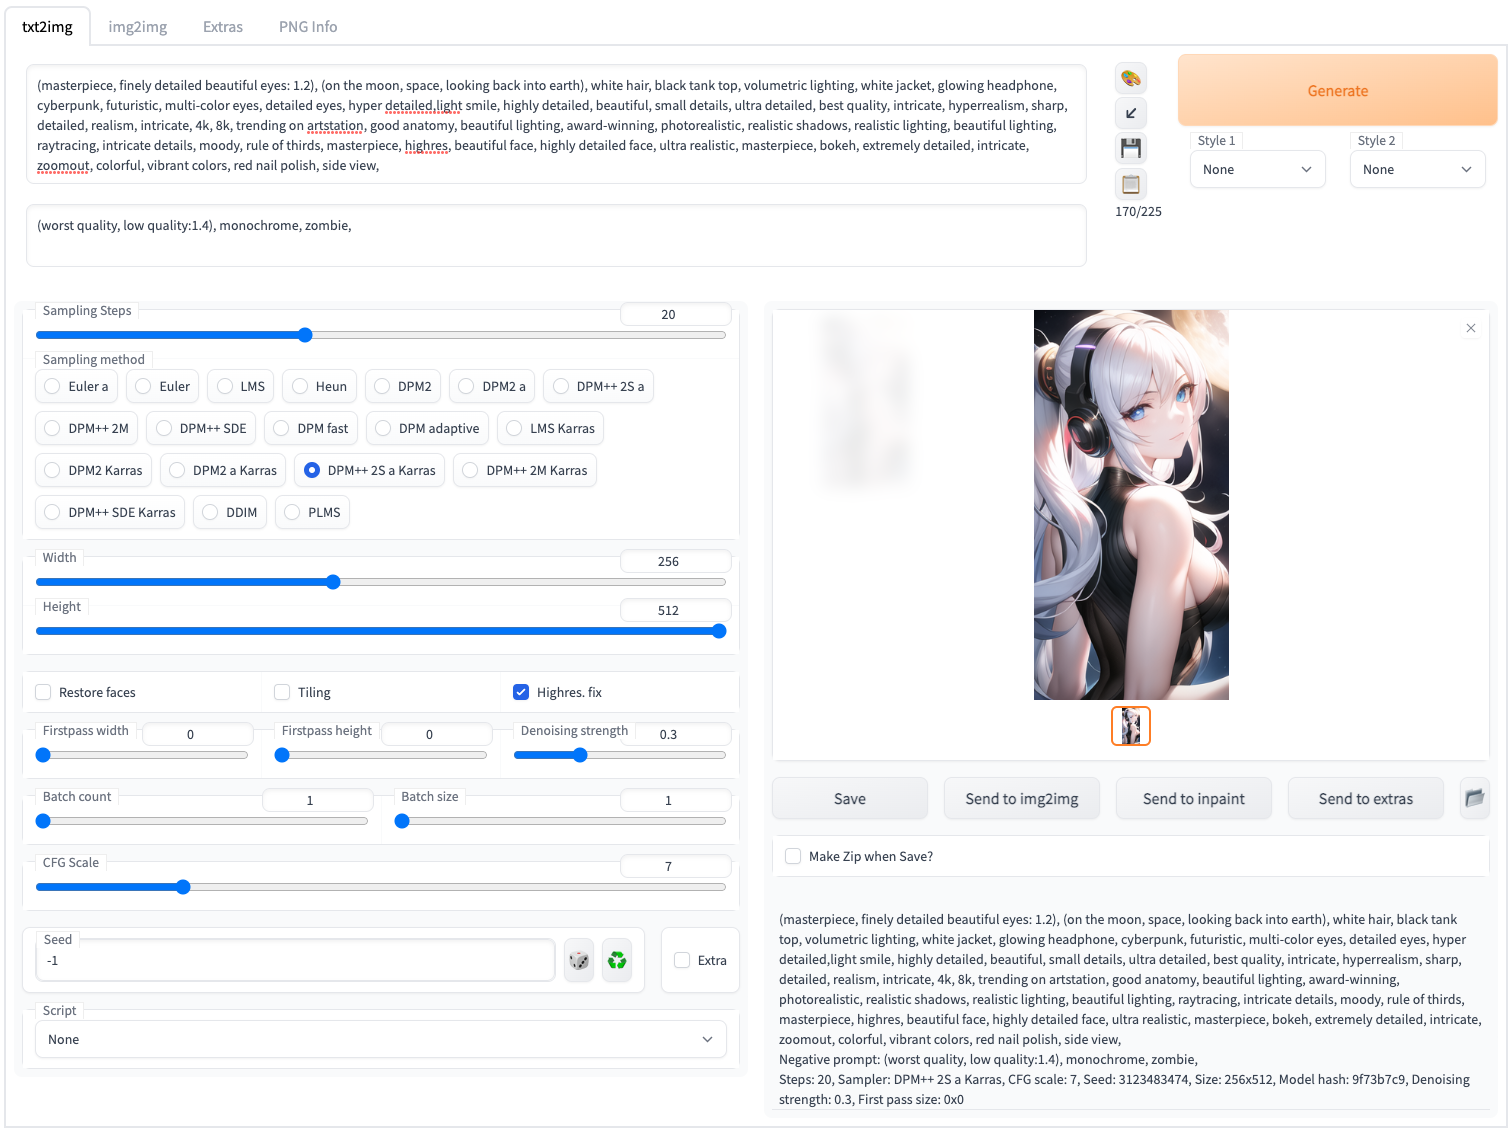

이 처럼, Model, Lora를 변경할 수 없지만, 기본 설정에 prompt만 좋은 설정만 해도 좋은 퀄리티를 뽑아 낼 수 있습니다.
참고로, 여기서 사용된 prompt와 설정은 아래와 같습니다.
Prompt:
(masterpiece, finely detailed beautiful eyes: 1.2), (on the moon, space, looking back into earth), white hair, black tank top, volumetric lighting, white jacket, glowing headphone, cyberpunk, futuristic, multi-color eyes, detailed eyes, hyper detailed,light smile, highly detailed, beautiful, small details, ultra detailed, best quality, intricate, hyperrealism, sharp, digital illustration, detailed, realism, intricate, 4k, 8k, trending on artstation, good anatomy, beautiful lighting, award-winning, photorealistic, realistic shadows, realistic lighting, beautiful lighting, raytracing, intricate details, moody, rule of thirds, masterpiece, (illustration:1.1), highres, (extremely detailed CG, unity, 8k wallpaper:1.1), beautiful face, highly detailed face, ultra realistic, masterpiece, bokeh, extremely detailed, intricate, zoomout, colorful, vibrant colors, red nail polish, side view,
Negative prompt:
(worst quality, low quality:1.4), monochrome, zombie,
Sampling method: DPM++ 2M Karras
Width: 256
Height: 512
Highres. fix: 체크
Denoising Strength: 0.3
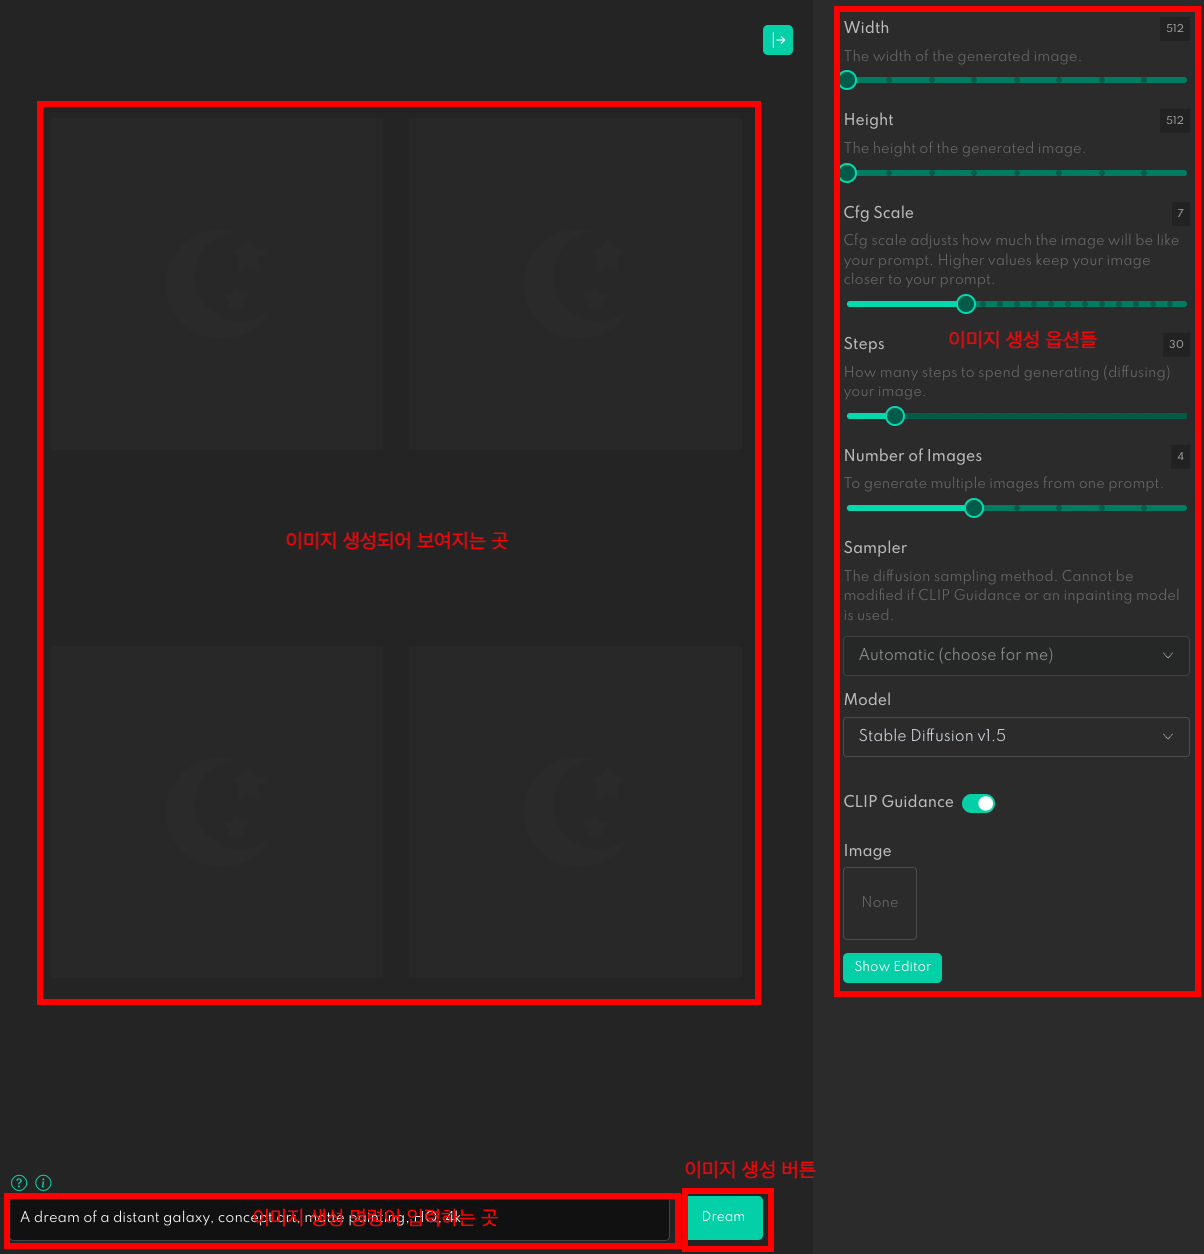
4. DreamStudio 이용하는 방법 (유료)
StableityAI 사에서 만든 DreamStudio를 이용하는 방법입니다.
이 사이트는 전체 무료는 아니고, 100개(정확히 기억나지 않음) 정도의 credit이 주어지고, 그림을 그릴 때마다 credit을 소모하는 방식입니다.
소모되는 credit의 양은 이미지 사이즈의 크기와 생성하는 계수로 계산이 됩니다. 자세한 내용은 홈페이지를 참고하시기 바랍니다.
그럼, 제공되는 인터페이스 확인을 위해 아래의 사이트로 접속합니다.
DreamStudio 링크: http://beta.dreamstudio.ai/
사이트 접속 후 보여지는 인터페이스 화면은 아래와 같습니다.
마치며
위 사이트들은 StabilityAI에서 제공하는 Stable Diffusion을 웹에서 간단히 사용하는 방법이며, Model을 변경하거나, Lora를 변경하거나 하는 전문적인 작업은 할 수가 없습니다. 하지만, 기본적인 사용을 하는 데는 전혀 문제가 없으며, 더군다나 좋은 GPU환경에서 빠르게 생성해 볼 수 있다는 장점이 있습니다.
Prompt 명령어에 익숙한 사용자라면 간단하게 디자인 기본 컨셉을 잡거나 하는데 매우 유용할 것 같아서 이 번 포스팅을 통해서 알려드립니다. 아무쪼록 도움이 되었길 바라며, 이 글을 마칩니다.
감사합니다.


댓글